HOME
CONTACT
LINKS
CONSULTING
HOME
CONTACT
LINKS
CONSULTING

Updated 2/19/06. I recently serviced the shock again replacing a few o-rings, a bunch of allen bolts, and changing the oil. I've added a few things here and there and updated the links.
As of this writing I've pulled my Boxxer apart and put it back together several times because of mistakes in the rebuild process. Hopefully this will help get other folks through the process without making alot of mistakes. Make sure you read EVERYTHING here before you start. The only information I've found that's available on the net is from the SRAM site. The information I'm providing is written specific to the 2001 Boxxer but it should apply for most models (besides some specifics like oil volume and oil seal configuration, but we'll get to that). Here are a few documents you will need. They are pretty tough to find on the SRAM site so I've stored the important ones locally:
- Official Manual (local PDF)
- Alternate Manual (local PDF)
- Oil/Dust Seal Removal/Installation (local PDF)
- Bushing Removal/Installation (local PDF)
- SRAM Tech Site
- Boxxer bushings/misc seals (RockShox Part#
11.4305.621.000)
- Boxxer External Hardware Kit (RockShox Part# 11.4305.614.000)
- Boxxer wipers/oil seals/crush washers
- #10 O-Ring (11/16"OD x 1/2"ID x 3/32") x2 - rebound/compression assembly end plug seals
- #14 O-Ring (15/16"OD x 3/4"ID x 3/32") x4 - volume spacer o-rings
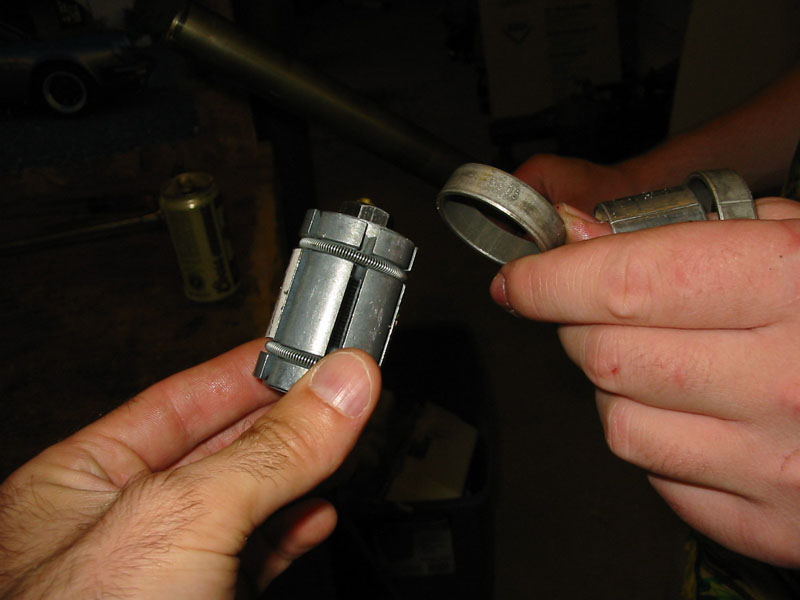
- Small tailpipe expander (your local auto parts store will have this)
- Long steel rod (home depot) or a long screwdriver
- Fork oil (get this from your local motorbike shop; it's much cheaper than getting it from a bike shop)
- Circlip pliers (you can also probably get away with an un-abused pair of needlenose pliers)
- Case of Coors Original
|
DO NOT GET THIS WRONG! Make sure you measure the distance from the top of the lower leg assembly (where the dust wiper sits) to the top of the lower bushings before removal so you know exactly how far to drive in the new ones. I did not do this when I took it apart so I sort of had to guess. However, it was an educated guess because you basically want to make sure that when the upper tube is at its max extension the bottom of the upper tube is still a little below the bottom of the lower bushing. This is something I got wrong the first time I replaced the lower bushings and, as a result, because the lower leg assembly is tapered, the upper tubes barely slid at all and at max extension the upper tubes were actually disengaging completely from the lower bushings. I did a large drop with the fork like this and paid dearly when the upper tubes jammed into the tops of the lower bushings only giving me about an inch of compression rather than the full six inches. |
Here are the general steps for disassembly and removing the bushings from what I remember:
- Cover your whole work area with newspaper. You will get fork oil everywhere!
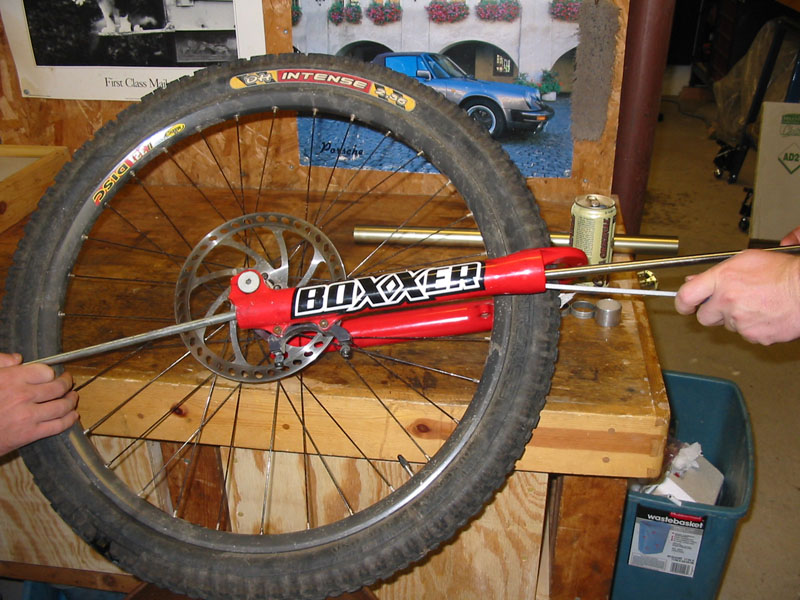
- Remove the upper tubes from the clamps on the headset. Also remove the wheel (I didn't in the pictures, but it would have made things easier).
- Remove one of the top caps from the upper tube (22mm wrench/socket) and dump the oil out. Cycle the upper tube up and down to pump the rest of the oil out of the leg. Replace the cap and repeat on the other side.
- After cycling out the oil and removing the top caps remove the springs and any spacers. Note the orientation and order.
- Loosen the shaft bolts a few turns and then smack them with a rubber mallet or regular hammer with a block of wood between. Now remove the shaft bolts all the way and then the upper tubes should slide out.
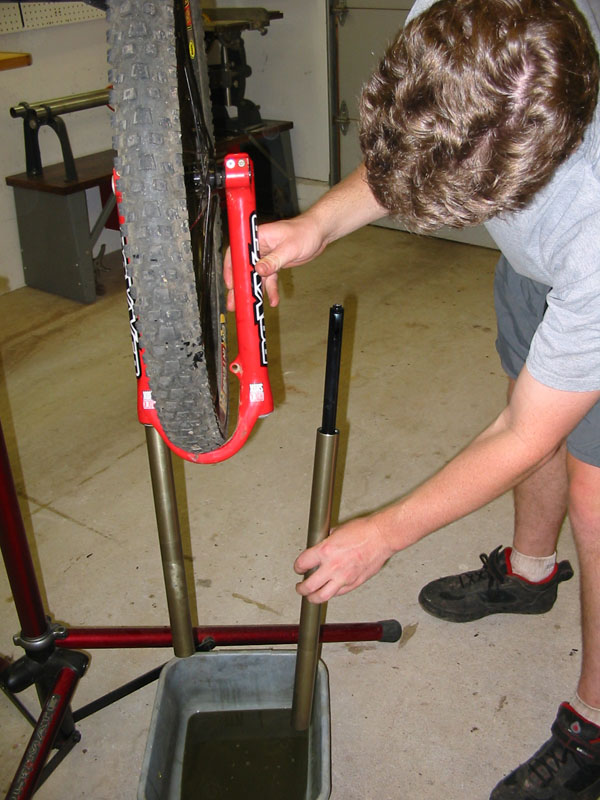
- Pry the dust wipers out of the lower leg assembly with a large flat blade screwdriver. You will now have access to the oil seals.
- Remove the oil seal/upper bushing snap ring with the circlip pliers. Pry out the oil seal and note the orientation of the removed parts (there's a thin washer in there that goes between the snap ring and oil seal, don't lose it).
- Now we get to remove the first bushing. Collapse the expander, drop it into the lower leg assembly below the top bushing and expand it so it fits snugly and is up against the bottom of the top bushing. You may have to jam a screwdriver down there to keep the expander from turning while you expand it.
- Slide the metal rod into the lower leg assembly through the shaft bolt hole and make contact with the expander. Then hammer on the metal rod or just bang it against the ground. Eventually the bushing will pop out.
- Repeat the same process for the bottom bushing. Note: the inside of the bottom part of the lower leg assembly is tapered so you may have to expand the expander a few times while you're in the process of banging out the bottom bushing. Also, don't worry about being too careful. If you mar up the insides of the lower leg assembly a little it's not a big deal because nothing slides on that surface (that's what the bushings are for).
Putting it back together is the reverse of taking it apart but here are some hints:
- You probably don't have to use the expander to knock the top bushing in but you will have to use it on the bottom one. Remember: bottom bushing first!
- Make sure the rubber bottom out pad is in the correct orientation (notched side up) in the bottom of the lower leg assembly before reassembling.
- Make sure you drive the bottom bushings down to the measurement I warned about before. The lower bushings do not have a lip to rest on like the top bushings. There is a visible lip down in the lower leg assembly but it is not where the lower bushings should rest (this fooled me the first time and we drove them down way too far). The bottom bushing slides down pretty easy but you will have to use the expander to drive it down the last few inches.
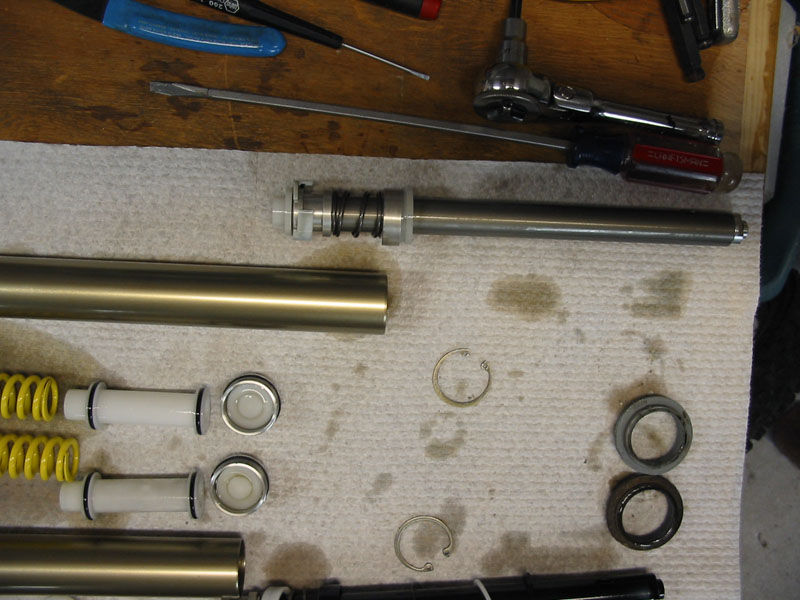
- If you take the compression and rebound assemblies apart make sure you know where all the o-rings and little parts go as they can be easily lost. Also, all the thin o-rings cannot be found anywhere so don't lose them or break them!
- Remember to replace the nylon crush washers on the shaft bolt washers.
- The dust wipers can be a real pain to fit in place. Put them in the freezer for 10 minutes or so before installation. This will shrink them down and make them easier to work with. You should be able to press them in place with your hand using a large socket.
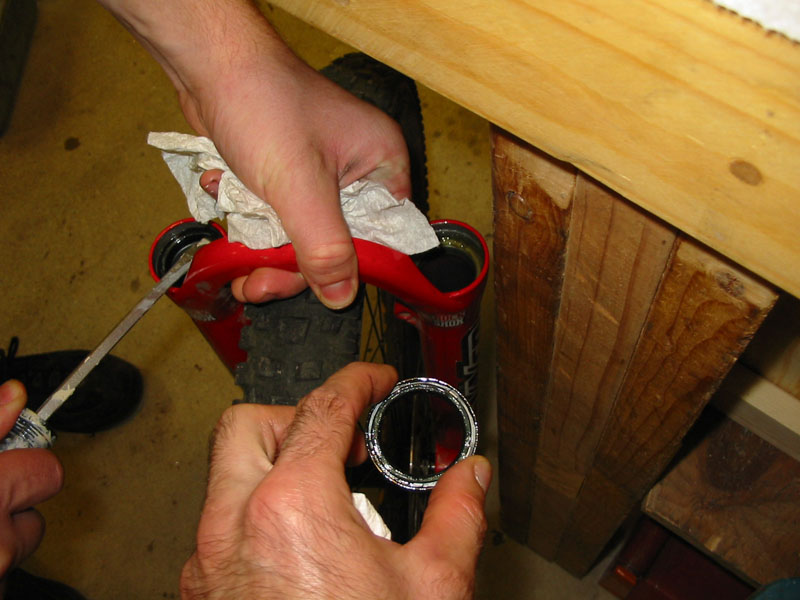
- Remember to cover anything that contacts anything else (bushings, oil seals, dust wipers, upper tubes, etc.) with grease before installation.
- Do not overtighten the shaft bolts. They're hollow and aluminum so they break pretty easy (we broke one during reassembly and had to fashion one out of an old metric bolt). I recently replaced all the bolts on the Boxxer with the external hardware kit listed above and that includes the shaft bolts<.
- You can use different springs/fork oil weights to customize the compression and rebound. I weigh about 175lbs and use a red spring and yellow spring with 10 and 15 weight fork oils. I believe each side should use about 165cc of oil (it says in one of the documents). Use the oil level from the first document above to get the amount of oil right. It says the top of the oil should be 152mm from the top of the tube with the leg fully compressed (and obviously without the springs present).
- To remove and install the upper tubes twist them while pulling up and down. Make sure the clamps are all the way loose as well.
- I've included some pics here of the major steps but there are more in General Biking II under Pictures.
Prying out the seals.
Compression and damper assemblies and other internals.
Closeup of the exhaust expander and bushings.
Driving out a bushing. Champa is operating the steel rod on the left. I am on the right with a long screwdriver in my left hand to keep the expander from turning and the ratchet is in my right hand to expand the expander.